
This guide will help you mod the YAPYAP game.
Getting Modding Tools
Before you start, you need to acquire necessary tools to mod YAPYAP:
- BepInEx. This is a modding framework for Unity – game engine YAPYAP is built upon. Download BepInEx 5 version (recommended; currently all mods built on it), or you can use BepInEx 6 Bleeding Edge Unity Mono. The code would be a bit different, depending on which version you decide to use.
- dnSpy. Decompiles .dll files so you know what you have to change. Download dnSpy.
- Visual Studio. IDE-application where you will build your mods. Download Visual Studio.
Installing BepInEx
Unzip the downloaded folder into YAPYAP game folder, example: C:\Program Files\Steam\steamapps\common\YAPYAP.
Start the game. BepInEx console will start as well; if it didn’t happen go to YAPYAP\BepInEx\config and open BepInEx.cfg file. Then search for [Logging.Console]. Change false to true. Example:
[Logging.Console]

## Enables showing a console for log output.
# Setting type: Boolean
# Default value: true
Enabled = true
Console is extremely important as it displays errors which allows you to check what’s wrong with your mod.
Installing dnSpy
Simply unzip to any folder and start dnSpy.exe.
Installing Visual Studio
Start the VisualStudioSetup.exe and select Visual Studio Community 2026 (or later if it is available). In Workloads tab select .NET desktop development. This will automatically select all the necessary components that will allow you to create mods for YAPYAP. They will require approximately 4 GB of your disc space.
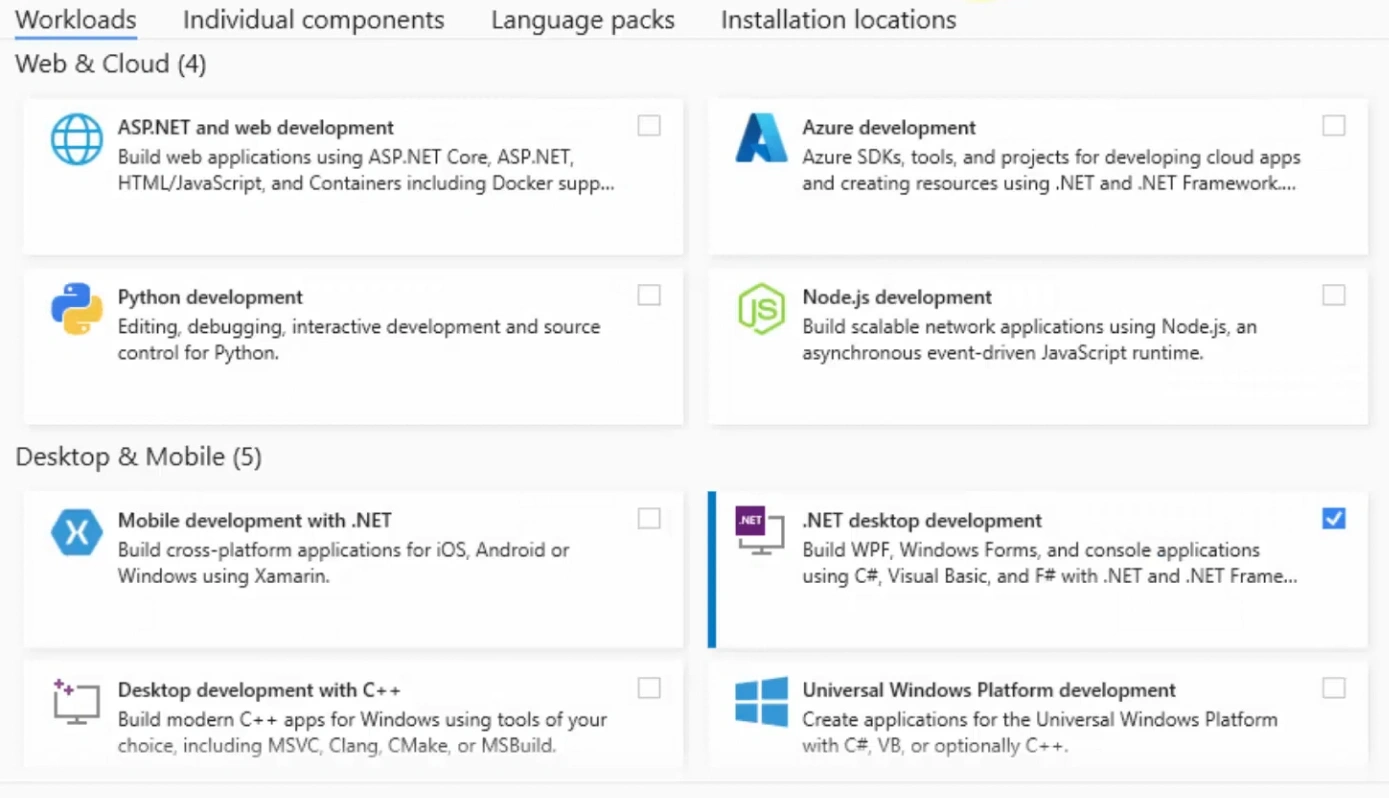
If some component wasn’t installed, you can do it later.
Additionally, you can install extra language packs or change the default installation path.
Creating a New Mod Project
After you’ve successfully installed Visual Studio, open it. It will ask you to enter your login details to use Copilot but you can skip it.
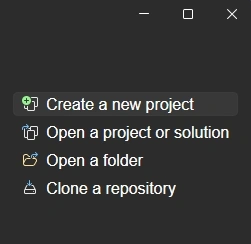
On the program start page select Create a new project:
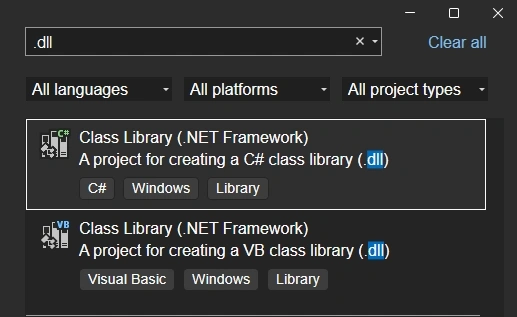
Then, search for dll and select Class Library (.NET Framework). Select a project for creating a C# (reads as C Sharp) class library, not a VB class:
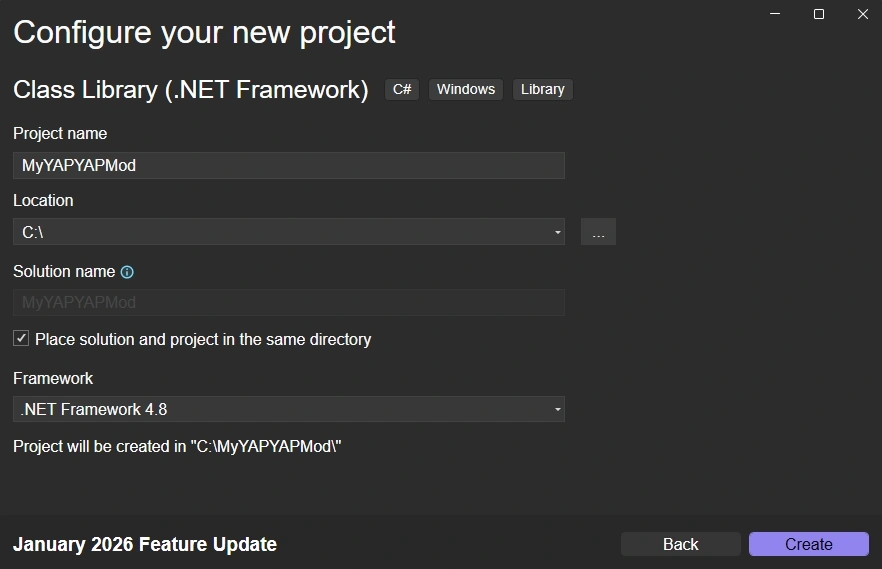
On the next page configure Project Name, Location, Solution name and Framework. You can also tick Place solution and project in the same directory:
After you click Create a new project will be created. Let’s quickly review its windows:
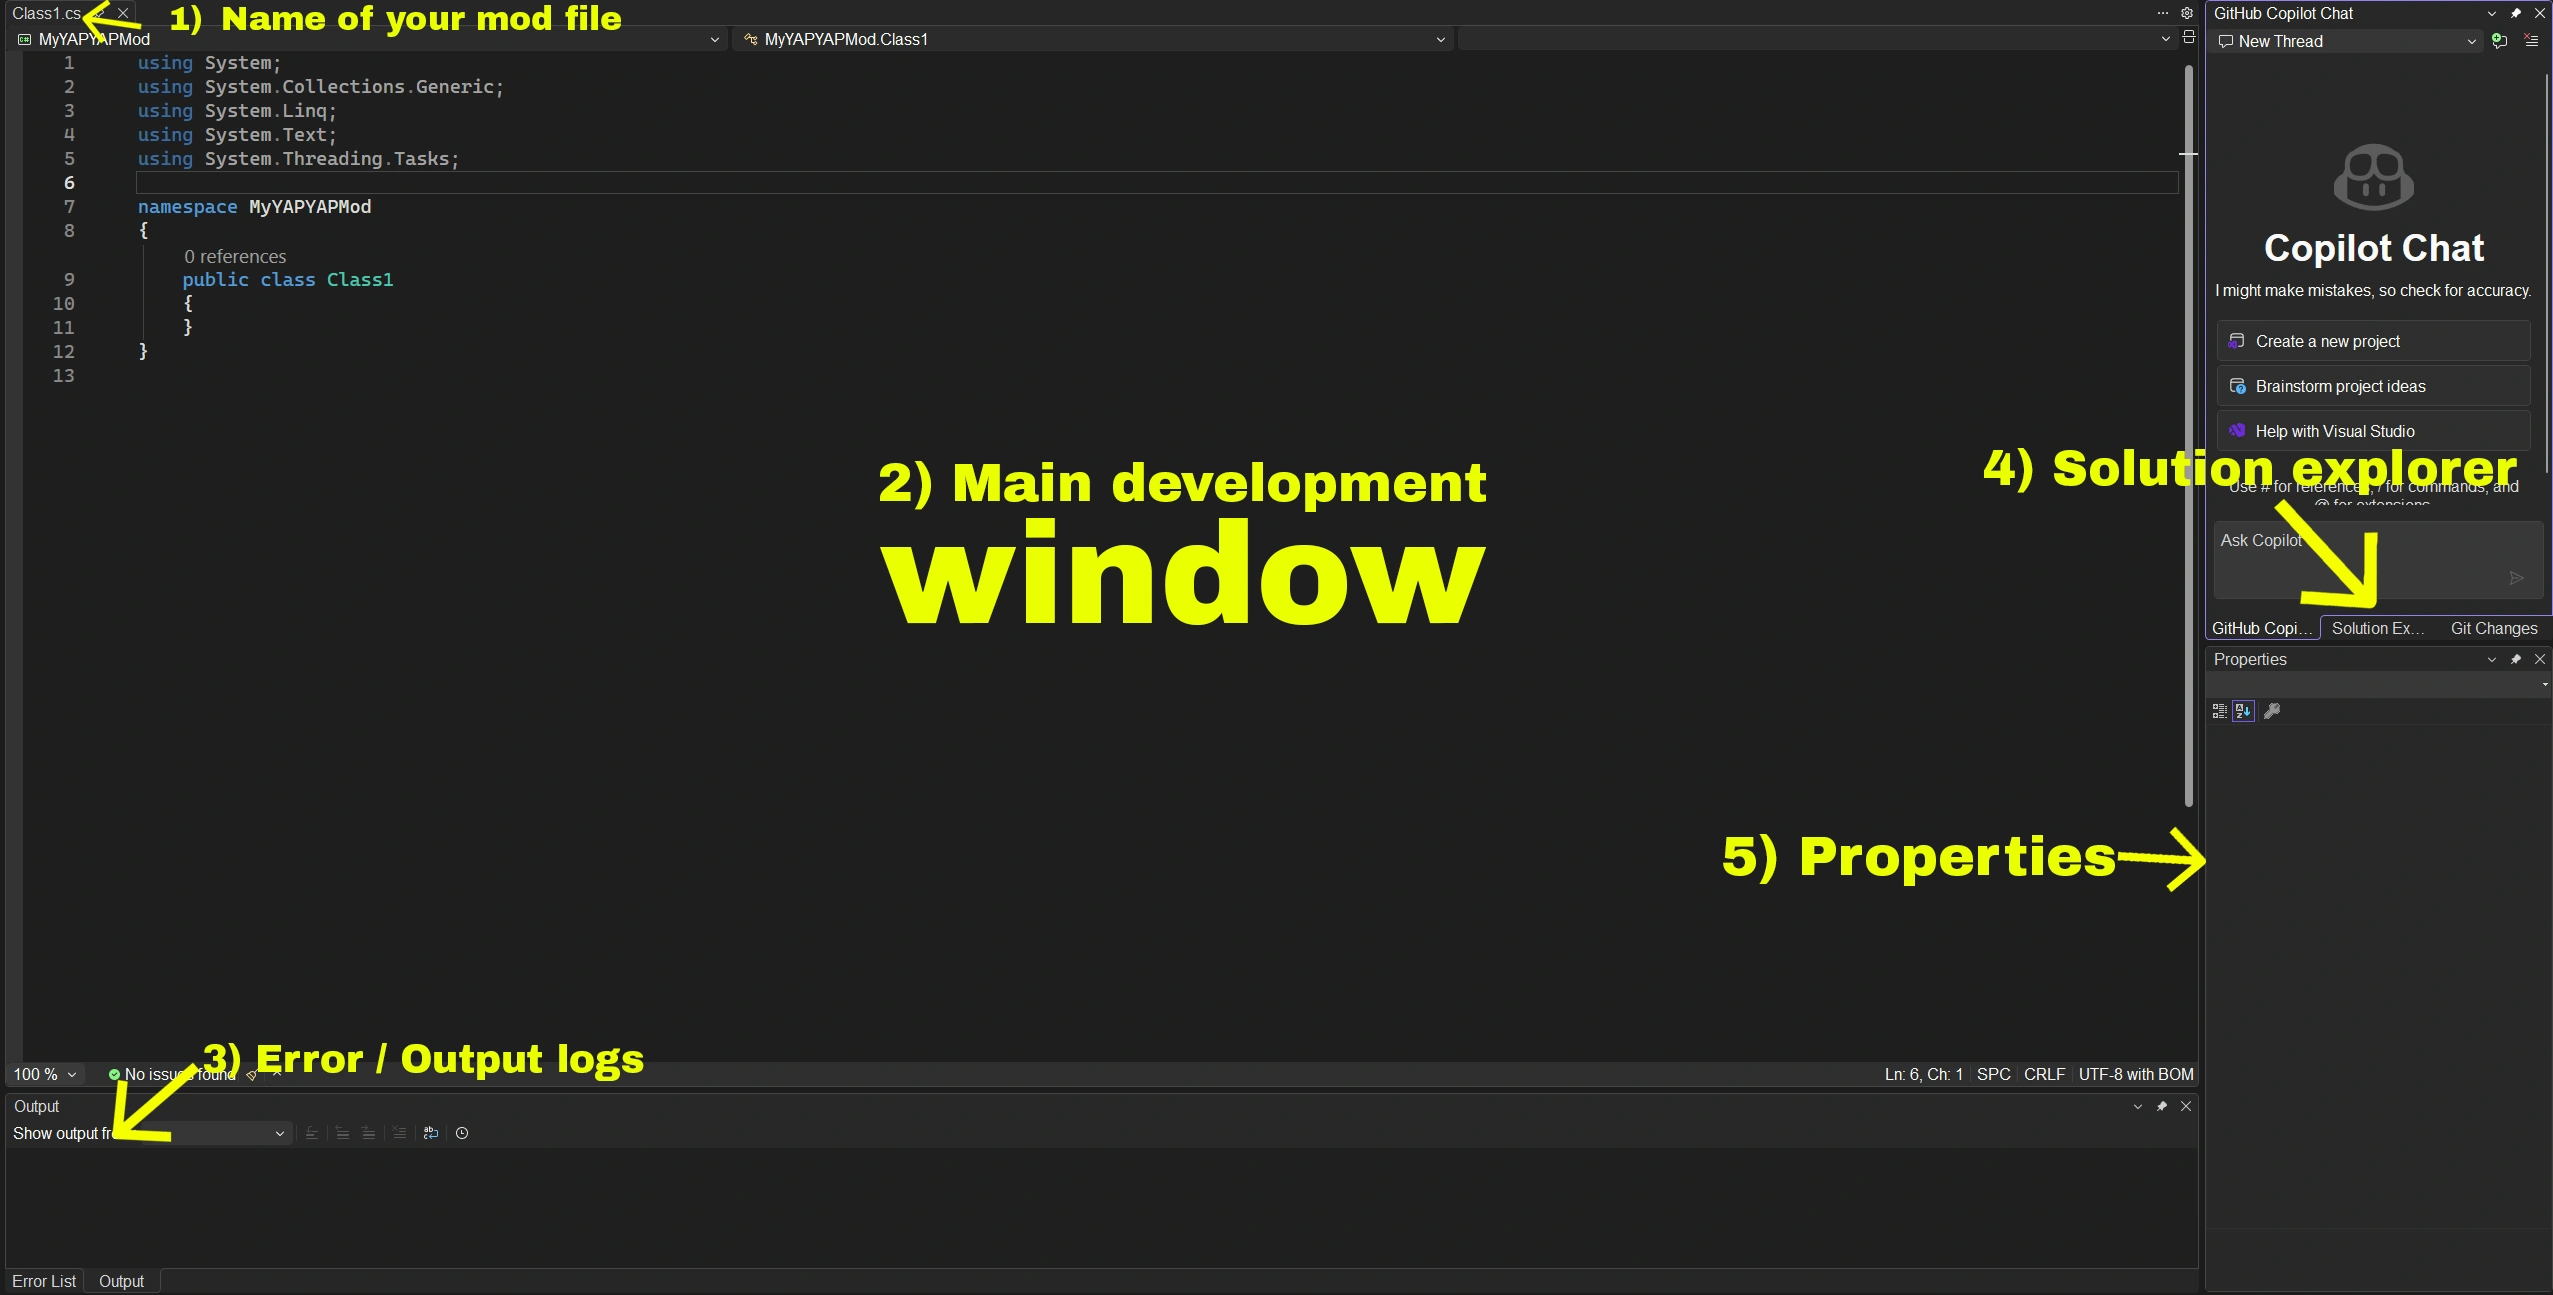
- Name of your mod file. You can leave it as it is but most people prefer to change it to something more meaningful (for example, the mod name).
- The biggest window is where your code is located.
- Error and output logs are useful to determine what’s wrong with the code. For example, if you reference something that is not currently present in the project, that’s where you get info on what file is missing.
- Solution Explorer where you add references to the project. More on that down below.
- Properties window for references and other things.
Adding References
In the world of Unity modding (for games like YAPYAP and many others), References are the “bridge” that allows your custom code to talk to the game’s code.
Think of a reference as a library card. If you want to use information from a specific book (the game’s code), you need a library card (the reference) to access it. Without it, Visual Studio has no idea what a “Player“, “Wand“, or even a “GameObject” is.
You are referencing specific .dll files (Dynamic Link Libraries). These files contain the compiled logic of the game.
For YAPYAP, you typically need to reference at least five files:
- BepInEx.dll: The mod loader file. This file provides the tools to actually inject your mod into the game. Located in YAPYAP\BepInEx\core.
- UnityEngine.dll: The Unity engine file. Contains the basic building blocks (Physics, Collisions, UI). Located in YAPYAP\yapyap_Data\Managed.
- UnityEngine.CoreModule.dll: is the “brain” file of the engine. It is the second most essential DLL because it contains the foundational classes you use in almost every script. Located in YAPYAP\yapyap_Data\Managed.
- 0Harmony.dll: a core library used by BepInEx to allow mods to modify the game’s code while it is running. It acts as a bridge that lets developers inject their own logic into existing game functions without permanently changing the original game files.
- Assembly-CSharp.dll: The game logic file. Contains the actual game code (e.g., how the YAPYAP mechanics work). Located in YAPYAP\yapyap_Data\Managed.
To add references, select Solution Explorer (located on the right) and right-click on References (you can also right click anywhere in that window but make sure References are selected), then select Add Reference:
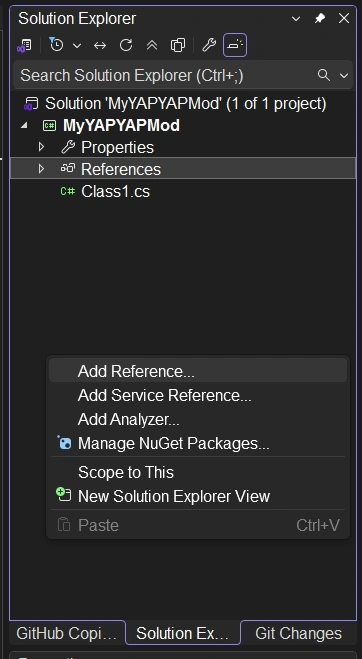
Select Browse, navigate to YAPYAP\BepInEx\core and YAPYAP\BepInEx\interop to add the required dll-files.
Building Your First YAPYAP Mod
Now theory is over, let’s build your first mod.
BepInEx 6 Code Example
Delete all code that you have and paste this (when using BepInEx 6 Bleeding Edge):
using BepInEx;

// This attribute tells BepInEx this is a mod.
// Format: ("Unique ID", "Display Name", "Version")
[BepInPlugin("myfirstmod.yapyap.console", "MyYAPYAPMod", "1.0.0")]
public class MyFirstMod : BasePlugin
{
    // Load is called when the mod is first loaded by the game.
    public override void Load()
    {
        // LogInfo sends a message to the BepInEx console
        Log.LogInfo("MyYAPYAPMod is enabled.");
    }
}
BepInEx 5 Code Example
If you decided to mod YAPYAP with BepInEx 5 (this is recommended option):
using BepInEx;

// This attribute tells BepInEx this is a mod.
// Format: ("Unique ID", "Display Name", "Version")
[BepInPlugin("myfirstmod.yapyap.console", "MyYAPYAPMod", "1.0.0")]
public class MyFirstMod : BaseUnityPlugin
{
    // Awake is called when the mod is first loaded by the game.
    public void Awake()
    {
        // LogInfo sends a message to the BepInEx console
        Logger.LogInfo("MyYAPYAPMod is enabled.");
    }
}
You’ll see some errors in the Error List. That’s because we need to add 3 references:
- BepInEx.dll (located in YAPYAP\BepInEx\core)
- UnityEngine.dll (located in \YAPYAP\yapyap_Data\Managed)
- UnityEngine.CoreModule.dll (located in \YAPYAP\yapyap_Data\Managed)
Why only three? Because this mod interacts with BepInEx console only and doesn’t need any additional game reference. When you launch YAPYAP it will simply will show in the console that the mod has been loaded.
Adding References
Next, change properties for both references. Select BepInEx then in Properties click on True and select False:
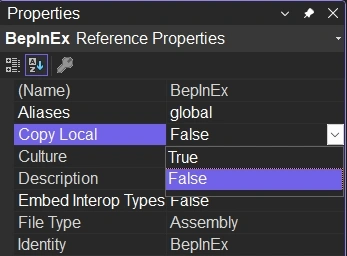
Do the same for UnityEngine and UnityEngine.CoreModule. We want to create only one mod file and don’t need all references as our output. Option False only uses references for compiling.
Build the Mod
Next, go to Build -> Build Solution or use F6 to compile the mod:
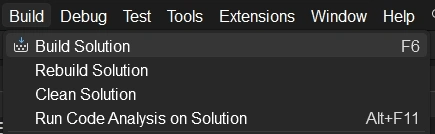
By default, the output mod will be located in bin\Debug folder. The mod’s file will be identical to the name of the project’s folder (usually it is the name of the project too).
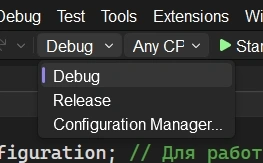
If you want to build the mod into bin\Release, select Release from the drop-down menu:
Now, go to the bin\Debug and you’ll see 2 files:
- MyYAPYAPMod.dll: the main mod file. Copy it to the plugins folder (YAPYAP\BepInEx\plugins).
- MyYAPYAPMod.pdb: the debug info file. You don’t need to copy it to the plugins folder, however, if a mod crashes the game it is essential to figure out what’s wrong. For example, if your mod crashes without a .pdb, the error log will say: NullReferenceException in MyFirstMod.dll. With a .pdb file present, the log will say: NullReferenceException in MyFirstMod.cs: line 42.
Now launch YAPYAP. In the BepInEx console you’ll see the following:

Congratulations! You have just created your first mod for YAPYAP!
Explaining the Code
Now let’s take a quick look at the code once again (BepInEx 6 version):
using BepInEx;

// This attribute tells BepInEx this is a mod.
// Format: ("Unique ID", "Display Name", "Version")
[BepInPlugin("myfirstmod.yapyap.consolemod", "MyYAPYAPMod", "1.0.0")]
public class MyFirstMod : BasePlugin
{
    // Load is called when the mod is first loaded by the game.
    public override void Load()
    {
        // LogInfo sends a message to the BepInEx console
        Log.LogInfo("MyYAPYAPMod is enabled.");
    }
}
If you have some coding knowledge (C# in particular), that will come in handy if you plan to create your own mods for YAPYAP. If you are newbie, there are some information for you:
- using statement is essentially a shortcut that tells the computer which “toolboxes” (namespaces) you are pulling code from, so you don’t have to type out their full technical addresses every single time.
- // are comments. They are not processed by the engine.
- [BepInPlugin(“myfirstmod.yapyap.consolemod”, “MyYAPYAPMod”, “1.0.0”)]:
- [BepInPlugin] is a piece of metadata (called an Attribute) that acts as a “Name Tag” for the mod loader. It tells BepInEx: “This specific class is a mod, and here is its identity information.”. Without this line, BepInEx will ignore your DLL entirely. It uses this attribute to “discover” your mod when the game starts up and to decide the order in which different mods should be loaded.
- myfirstmod.yapyap.consolemod: The unique internal “fingerprint” for your mod also known as GUID – Globally Unique Identifier. It must be unique so it doesn’t clash with other mods.
- MyYAPYAPMod: The “friendly” mod name that appears in the console and log files.
- 1.0.0: The current version of your mod, used to track updates.
- public class MyFirstMod : BasePlugin: This line of code defines the entry point of your mod and establishes its relationship with the mod loader.
- public: An access modifier that makes your code visible to the outside world; without it, the BepInEx mod loader would be unable to find or launch your mod.
- class: A container that groups your variables and functions into one single “object” (your mod) so the computer knows they all belong together.
- public class MyFirstMod: Creates a new, visible blueprint for your mod named “MyFirstMod.”
- : : Represents Inheritance. it tells the computer that your mod is a “child” of the BepInEx system.
- BasePlugin: The “parent” template provided by BepInEx. By connecting to it, the mod automatically gains the ability to talk to the game, use the console, and run its own code during startup. BepInEx 5 (stable version) uses BaseUnityPlugin instead.
- public override void Load(): This line of code is the “start button” for your mod. You already know what public is so we explain the following:
- override: Replacement instructions. BepInEx 5 doesn’t not require it here.
- void: Return type. This means the method performs an action and then finishes; it does not “return” or send back any data or numbers.
- Load(): This is the specific name of the action that BepInEx is programmed to look for and run the moment the game starts. In BepInEx 5 you should use Awake instead.
- Log.LogInfo(“MyYAPYAPMod is enabled.”): this is a method call that sends a text message to the BepInEx console:
- Log: This is the built-in communication tool (logger) provided by BasePlugin. BepInEx 5 uses Logger instead.
- .: This tells the computer to look inside the Log tool to find a specific action.
- LogInfo: A specific built-in BepInEx function that prints a standard message.
- (“MyYAPYAPMod is enabled.”): The specific text (string) we want the console to display.
- ; At the end of a C# sentence tells the computer the instruction is finished.
You can find way more information on BepInEx on their official documentation website (this and other links are at the bottom of the page).
How to Add New Components / Tools
In a case you missing any component in Visual Studio, go to Tools->Get Tools and Features:
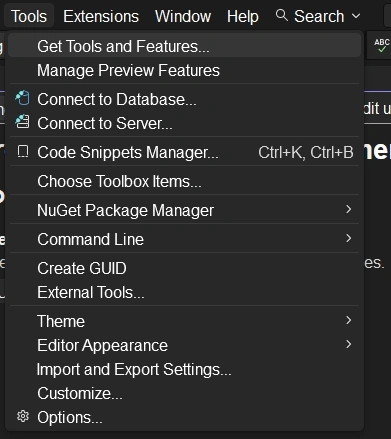
This will launch Visual Studio’s installer where you can select new components you’re missing to make your mod work.
How to Use dnSPY
Modding games like YAPYAP begins with deconstructing the game’s assembly. And that’s why you need dnSpy.
The program features 3 main windows:

Assemble Explorer on the left. That’s basic navigation where you can select files, modules, namespaces, classes, methods, etc.
Main window. Displays code (and you can edit it there too).
Search. Very useful, since when developing a mod you’ll be searching for things more often than not.
dnSpy hierarchy
In dnSpy all elements follow a strict structural hierarchy. It looks like that:
- Assembly. This is the primary building block of .NET applications. It is the actual file you see in your folder and drag into dnSpy.
- Module is a smaller component within an assembly. While a single assembly can contain multiple modules, in 99% of cases (including YAPYAP), there is exactly one module per assembly. It acts as the container for all the code inside that file.
- Namespaces. They are used to organize classes in groups and prevent naming conflicts. It’s like a folder system for code.
- Types. Main structures you interact with. This includes:
- Classes: The “blueprints” for objects (e.g., PlayerController). Most of the code in YAPYAP is within classes.
- Structs: Light data structures.
- Interfaces: Contracts for what a class should do.
- Enums: Lists of named constants.
- Members. Elements that live inside a Type. There are a few of them:
- Methods: Actions (e.g., Update(), Jump()).
- Fields: Variables that store data (e.g., float speed).
- Properties: Controlled ways to get or set data.
- Events: Notifications that something happened.
Exploring Assembly-CSharp.dll
Now, let’s see what classes are present in YAPYAP. Delete all default files in the assembly explorer (File -> Close All). Then select File -> Open:

Navigate to YAPYAP\yapyap_Data\Managed and select Assembly-CSharp.dll. Click on assembly Assembly-CSharp (0.0.0.0), then on module Assembly-CSharp.dll. As you can see, the code in the main window changed – it displays what is currently selected. It also opened up the next hierarchy:
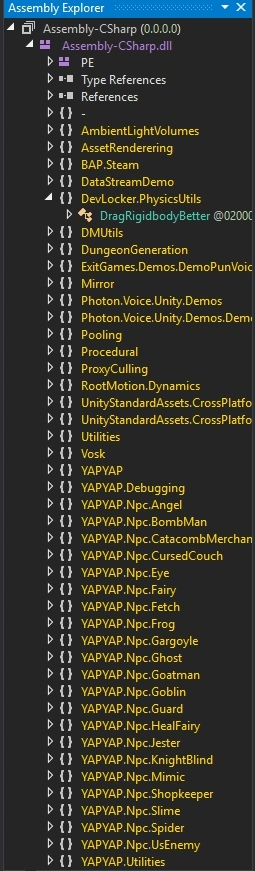
As you can see, each element has its own icon. It may look overwhelming at the start, but you’ll get quickly get used to it.
Basic Operation
Now, let’s do the most basic operation you can do in dnSpy – search for something. What if you want to make a YAPYAP mod that increases maximum player’s health? Our keyword would be health or maxhealth. Let’s type the latter in the search field at the bottom:
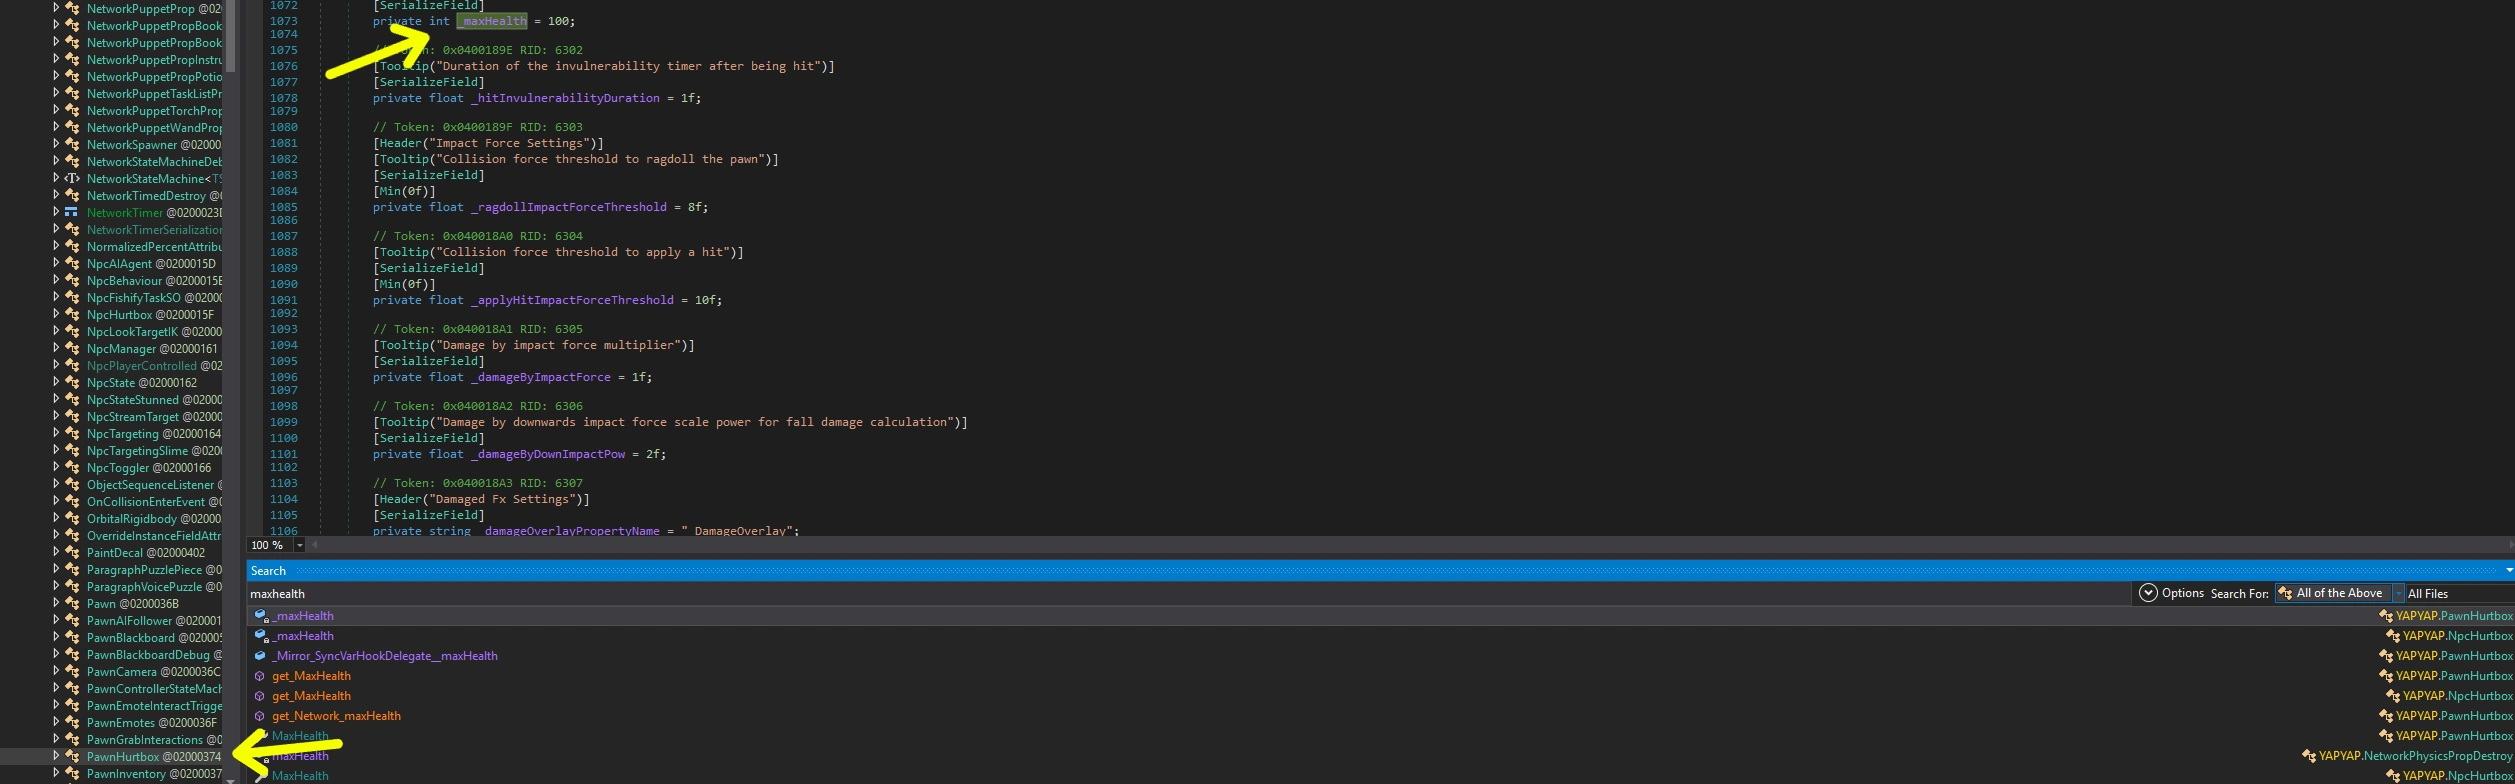
If you double-click on the any search result, dnSpy will automatically select the element (type) where this keyword appears. In the image above, it selected PawnHurtbox class inside YAPYAP namespace.
By searching for specific types and members (such as classes, methods, structs, etc.) you can identify exactly how the game handles its logic. Once you’ve located the right element, you can inject custom code with BepInEx or modify the existing logic to change how the game behaves.
Search Options
By default, the tool searches for all available types. However, you can use search function to look for a specific type. For that, click on a All of the Above:
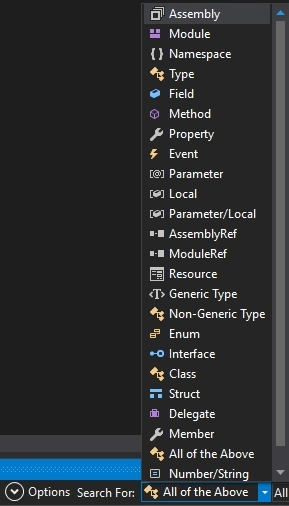
As you can see, you can search for a specific:
- Assembly
- Module
- Namespace
- Type
- Field
- Method
- Property
- Event
- Parameter
- Local
- Parameter/Local
- AssemblyRef
- ModuleRef
- Resource
- Generic Type
- Non-generic type
- Enum
- Interface
- Class
- Struct
- Delegate
- Member
- Number/String
By default, All files option is selected. Click on it, to select Selected Files, Files in the Same Folder or Selected Type:
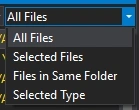
Selected Type searches only within the selected type. Alternatively, you can use Ctrl+F to search within a selected class, module, or other element.
Lastly, if you click on the Options button, it will reveal additional search settings:

Useful Links
- Official BepInEx documentation
- dnSpy on GitHub
- Official Visual Studio docs
- C# language documentation on microsoft.com
This guide is constantly updated.